Have you ever looked at breathtaking images of the Milky Way and wondered if you could create something similar from your backyard? The good news is that learning How to Capture Stunning Astrophotography at Home is more achievable than ever. You do not need a remote desert or a professional observatory. With the right setup, planning, and technique, you can photograph the night sky from home and produce impressive results.
This complete guide will walk you through equipment, camera settings, editing techniques, and pro tips. By the end, you will understand exactly How to Capture Stunning Astrophotography at Home like an experienced night-sky photographer.
Why Astrophotography at Home Is Possible
Many beginners assume they must travel far away to capture stars. While dark skies help, modern cameras and editing software allow you to compensate for moderate light pollution.
You can check your local sky conditions using the
light pollution map tool. This helps you understand your sky quality and plan accordingly.
Even suburban skies can produce beautiful star trails, planetary shots, and Milky Way images with the right technique.
Essential Equipment for Astrophotography
1. Camera
A DSLR or mirrorless camera with manual controls works best. Full-frame sensors capture more light, but crop sensors also perform well.
2. Wide-Angle Lens
Choose a lens with a wide aperture (f/2.8 or lower). This allows more light into the camera.
3. Tripod
A sturdy tripod is critical. Long exposures require absolute stability.
4. Remote Shutter or Timer
This prevents camera shake when pressing the shutter button.
Before investing, review trusted resources like
astrophotography gear guide. Expert reviews can help you choose cost-effective equipment.
Many photography bloggers turn gear reviews into passive income using affiliate marketing. Compared to running a dropshipping business, recommending gear through affiliate links is often more practical. When evaluating affiliate vs dropshipping, the affiliate model requires less logistics and inventory management, making it ideal for a niche online business.
Best Camera Settings for Night Sky Photography
Understanding exposure settings is key to mastering How to Capture Stunning Astrophotography at Home.
Use Manual Mode
Manual mode gives full control over exposure.
Set a Wide Aperture
Use f/2.8 or wider if possible.
Adjust ISO Carefully
Start between ISO 800 and ISO 3200. Test different levels based on your light conditions.
Follow the 500 Rule
To avoid star trails, divide 500 by your lens focal length. For example, with a 20mm lens:
500 ÷ 20 = 25 seconds maximum exposure.
This rule ensures stars remain sharp rather than streaked.
Choose the Right Time and Location
Shoot During a New Moon
Moonlight can wash out stars. Use moon phase trackers like
moon phase calendar to plan your shoot.
Check Weather Conditions
Clear skies are essential. Even thin clouds reduce clarity.
Position Away from Direct Lights
Turn off nearby outdoor lights if possible. Shield your lens from streetlights.
Focus Accurately in the Dark
Autofocus struggles at night. Switch to manual focus.
Point your lens at the brightest star or distant light. Zoom in using live view. Adjust focus until the star appears as a sharp pinpoint.
Precise focusing makes a dramatic difference in image quality.
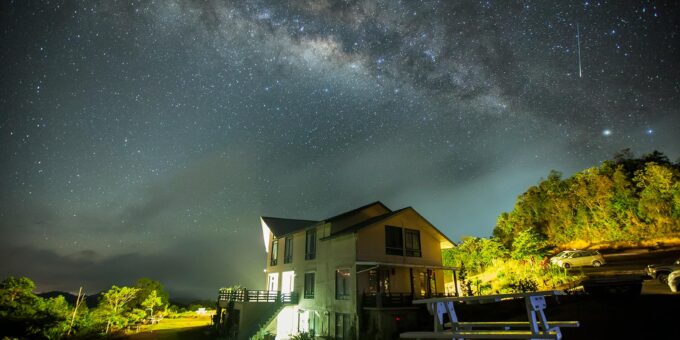
Capture the Milky Way at Home
The Milky Way is one of the most popular targets when learning How to Capture Stunning Astrophotography at Home.
Use planning tools like
Stellarium sky map to identify when the Milky Way core is visible in your area.
Compose your shot with a foreground element. Trees, rooftops, or landscapes add depth and interest.
Try Star Trail Photography
If your area has moderate light pollution, star trails are an excellent alternative.
Set your camera to continuous shooting mode. Capture multiple 30-second exposures for 30–60 minutes. Later, stack them using software.
This technique produces circular streaks around the North Star.
Editing Your Astrophotography Images
Editing is where your images truly come alive.
Use RAW Format
Shoot in RAW for maximum detail and flexibility.
Adjust White Balance
Reduce orange tones caused by light pollution.
Increase Contrast and Clarity
Enhance star visibility without over-processing.
Advanced photographers often use stacking techniques. Stacking multiple exposures reduces noise and increases sharpness.
Common Mistakes to Avoid
Using Auto Mode
Automatic settings rarely capture enough light.
Overexposing the Sky
Too much exposure leads to washed-out stars.
Ignoring Foreground Composition
Foreground elements add scale and visual interest.
Not Practicing Enough
Astrophotography improves with experimentation.
Advanced Techniques for Professional Results
Use a Star Tracker
A star tracker follows Earth’s rotation. This allows longer exposures without star trails.
Shoot Planetary Images
Attach your camera to a telescope for detailed shots of Jupiter or Saturn.
Create Panoramas
Capture multiple vertical shots and stitch them into a wide Milky Way panorama.
Turning Astrophotography Into Income
Once you master How to Capture Stunning Astrophotography at Home, you can monetize your work.
Many photographers build an online business selling presets, prints, or courses. Others review cameras and lenses using affiliate marketing.
Comparing affiliate vs dropshipping, affiliate programs often suit creative niches better. Running a dropshipping business for camera gear requires managing suppliers and returns. In contrast, affiliate partnerships allow you to focus on content creation while generating passive income.
High-quality astrophotography content attracts premium advertisers, improving your ECPM and overall revenue potential.
How Long Does It Take to Master Astrophotography?
Beginners can capture decent Milky Way shots within a few attempts. However, mastering advanced techniques may take several months of consistent practice.
The key is experimentation. Adjust settings. Try different compositions. Learn from each session.
Final Thoughts on How to Capture Stunning Astrophotography at Home
Learning How to Capture Stunning Astrophotography at Home is a rewarding journey. You do not need expensive observatories or remote deserts. With proper planning, manual settings, and patience, your backyard can become a powerful creative studio.
Remember these essential steps:
- Use manual settings with wide aperture and controlled ISO
- Shoot during new moon phases
- Stabilize your camera with a tripod
- Focus manually for sharp stars
- Edit carefully using RAW files
The night sky offers endless creative opportunities. Step outside tonight, set up your camera, and begin capturing the universe from home.